What is Bittle?
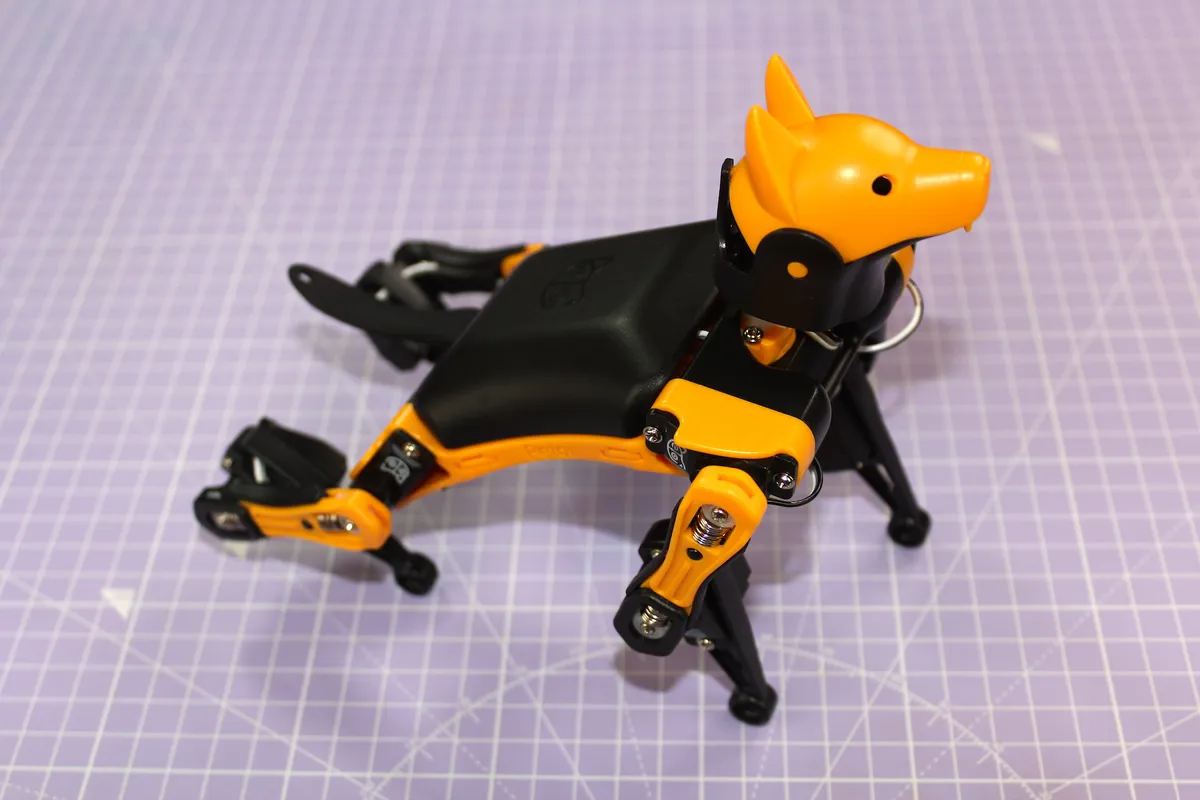
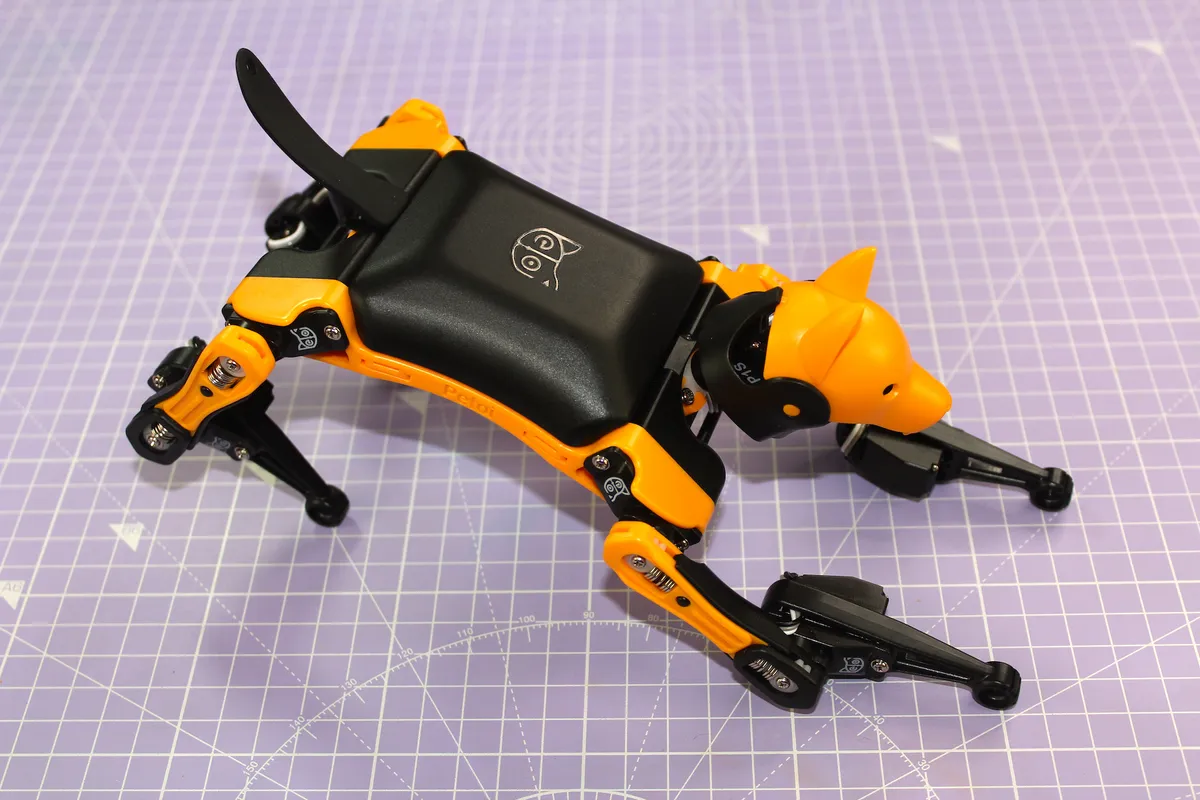
Bittle is a DIY, servo-based robot dog from Petoi, controllable via Bluetooth, infrared and WI-FI. It comes disassembled in kit form (although there is a pre-built option available), and once assembled it's remarkably agile, operating via remote control, via the app or via a number of different programming options (more on that below). You can run demo codes before writing your own, and it’s a great little tool to learn robotics with the open source software.
The robot is built on Petoi’s OpenCat open source platform and features a customised Arduino board to coordinate movements. And, being open source, users can add on different smart sensors, accessories or even AI chips. After playing with Bittle for around a week, I’ve found it to be a practical and engaging application for those keen to get into coding and/or robotics. Not to mention it’s great fun to build.
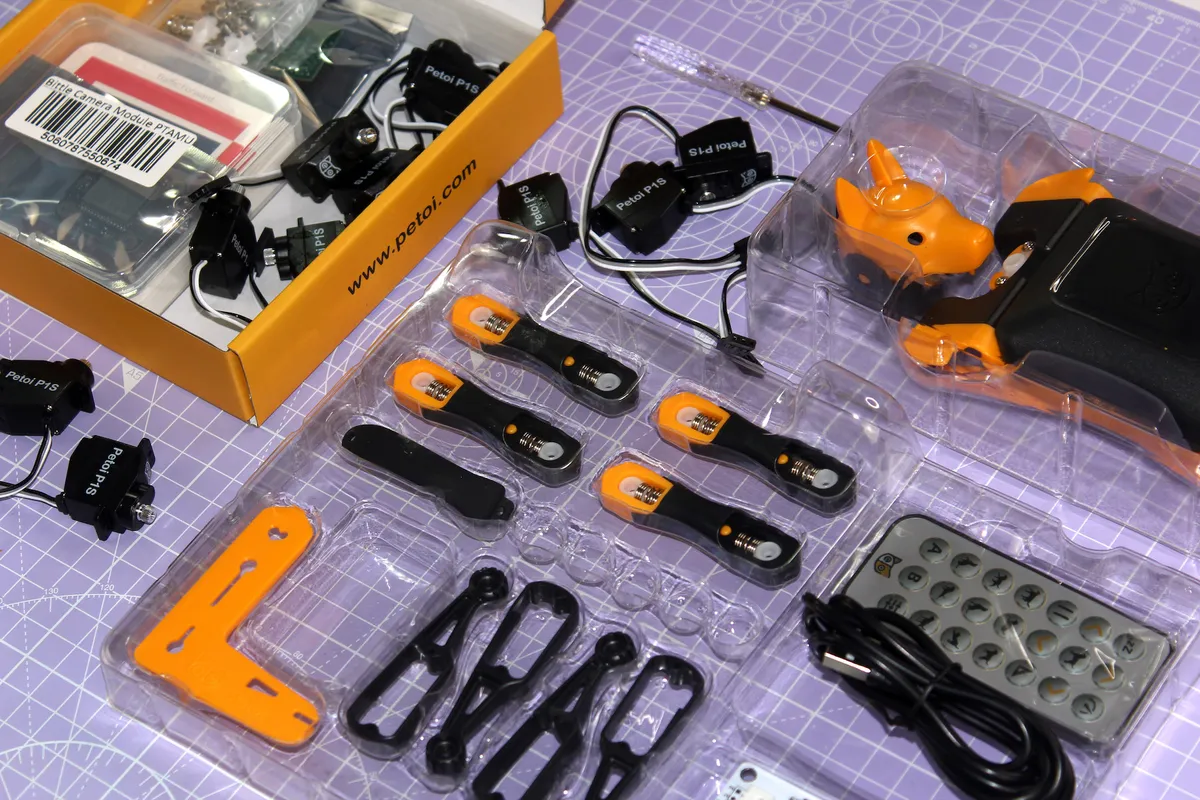
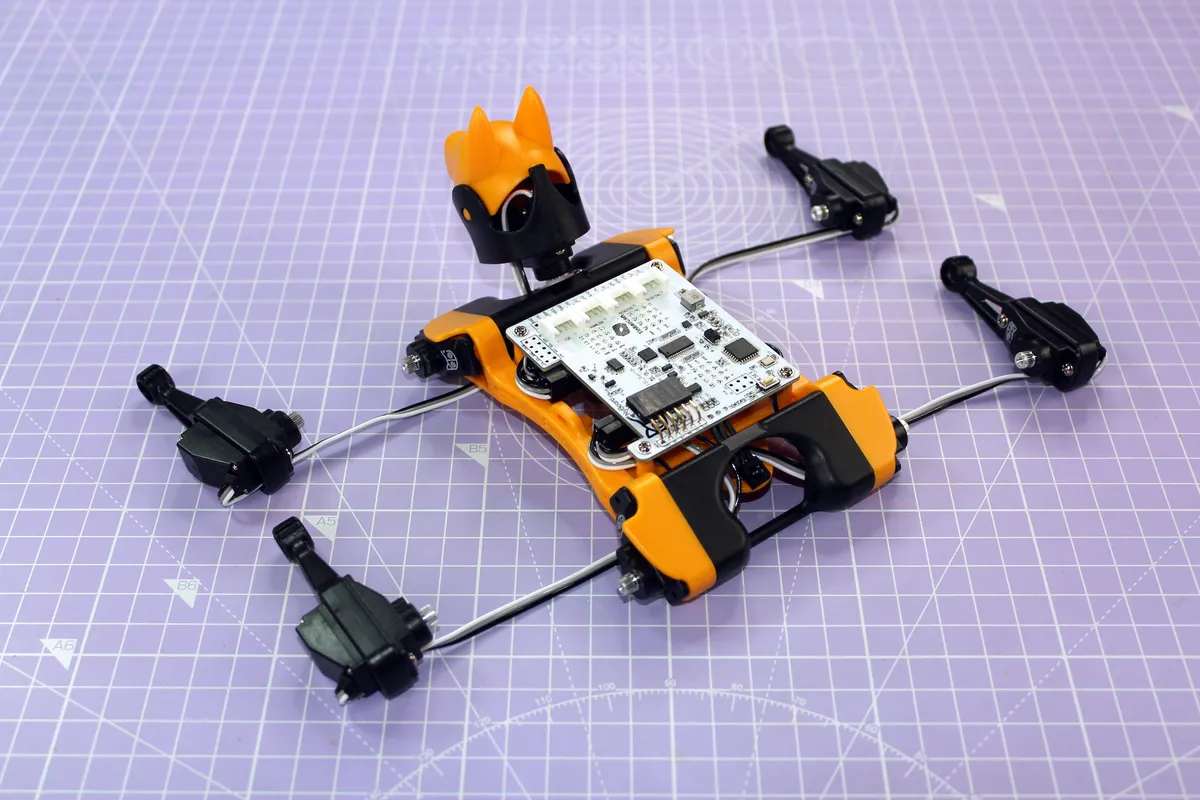
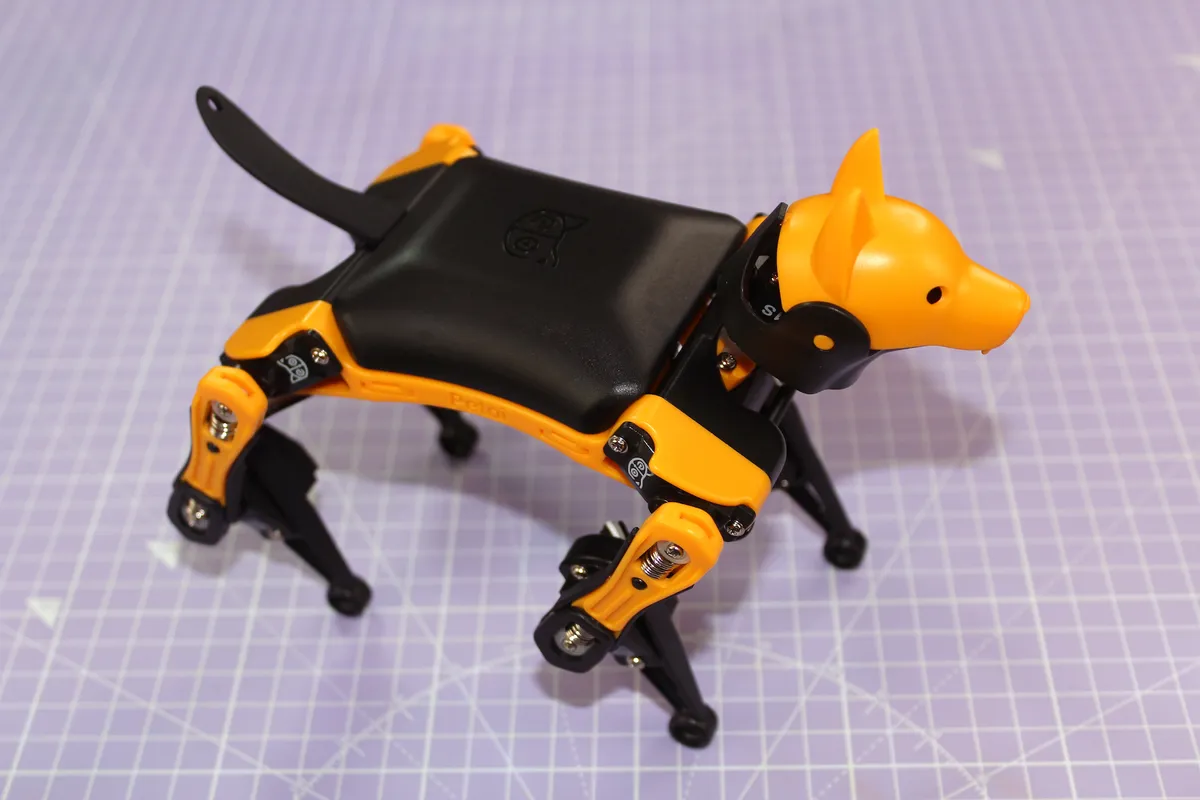
Bittle is a small robot, just a little bigger than your palm, and weighs in at just 290g. It’s a versatile little gadget that can detect orientation and will even right itself, should it end up on its back (and it will). The highly customisable NyBoard (essentially Bittle's motherboard) can support a whole host of additional hardware, including an intelligent camera module, sound sensor, light sensor, touch sensor, PIR Sensor and even an OLED display.
Bittle is the result of a crowdfunding campaign on Kickstarter back in 2020, when it smashed the original target of $50,000, raising instead just over $500,000.
For more tech inspiration, browse our ultimate list of cool gadgets, or, if you’re keen to dive into the world of coding, why not check out our round-up of the best coding toys for kids.
- Buy the Bittle construction kit from Amazon (£299.99)
- Buy the pre-assembled Bittle from Amazon (£309.99)
What are servos?
Think of servos as tiny motors. But unlike motors that continuously turn over, servos can be precisely manipulated so that you can adjust limbs by the merest fraction. Servos are commonly found in robotics, as they are small, powerful and easy to program. Nine servos are used to actuate Bittle; eight for the walking joints and one for head panning.
What is open source?
Open source software (OSS) is a type of computer software with a source code that can be seen, modified, or enhanced by anyone. OSS is a non-propriety software that is publicly accessible, and the code can also be distributed to anyone, and for any reason.
Source code is essentially a set of instructions that a programmer uses, and it’s usually written in plain text.
Building Bittle
Building the robot can be accomplished in as little as around 30-60 minutes. However, if you don’t fancy putting it together yourself there’s also a pre-built option you can buy, although I found that building Bittle was very much part of the fun.
The design has been modified since the original version was released in 2020. Now, the body chassis comes fully assembled, with the neck already fixed in place. Gone also are the seven RGB LEDs on the NyBoard, and although useful for debugging, they’re covered up (for the most part) by the bodyframe cover. The legs too, have had a modification; gone are the days of breaking your fingers trying to get the shock-absorbent springs in place. Instead, the legs only require you to install the servos and secure them with the self-tapping screws.
This, however, does bring me onto a minor gripe with the design; the included screwdriver is simply too small. It’s near impossible to get enough leverage to fasten the screws all the way. And, being self-tapping screws, they require more pressure to fasten them into the robot. I had success using both a standard-sized Phillips screwdriver and an electric one.
The battery fits easily into the bottom of the bodyframe and slides up and down a pre-cut channel. This is particularly useful for changing batteries or shifting the centre of mass if you decide to opt for the add-on components (as the heavier, chunkier part of the battery is on the front). For reference, the cable comes out the back of the battery, and loops around so that the connector is facing towards the front.

Bittle uses nine P1S micro servos (eight for the walking joints and one for the neck) specially designed for Bittle, plus a spare. Having this many servos drastically increases the versatility of movement that can be achieved, and each has a controllable angle of 270°, which is very welcome in a robot at this price point.
Construction process
The general construction process begins with slotting four long-cable servos into the lower leg pieces, then fixing them into position with the self-tapping screw; own screwdriver is recommended. A short-cable servo forms the neck joint, slotting into the head and securing as before. Once the neck servo is in place, the head can be popped on and off the main frame of the robot with ease.
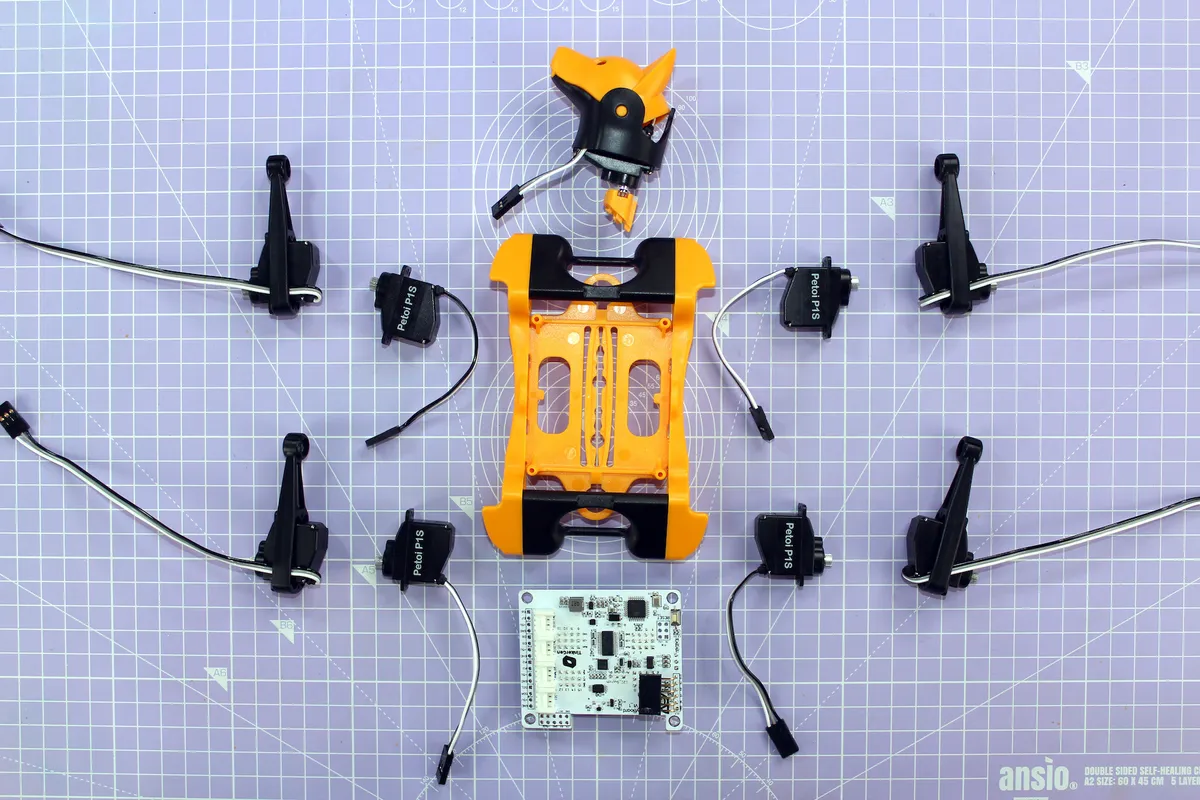
Four short-cable servos are used for the shoulders and slot easily into position on the bodyframe. Once you’ve secured these with the screws, the cables on the legs and head are easy enough to feed through the body. It does get a bit fiddly at this point as there are lots of wires hanging loose, so it’s important to keep them as organised and tidy as possible.
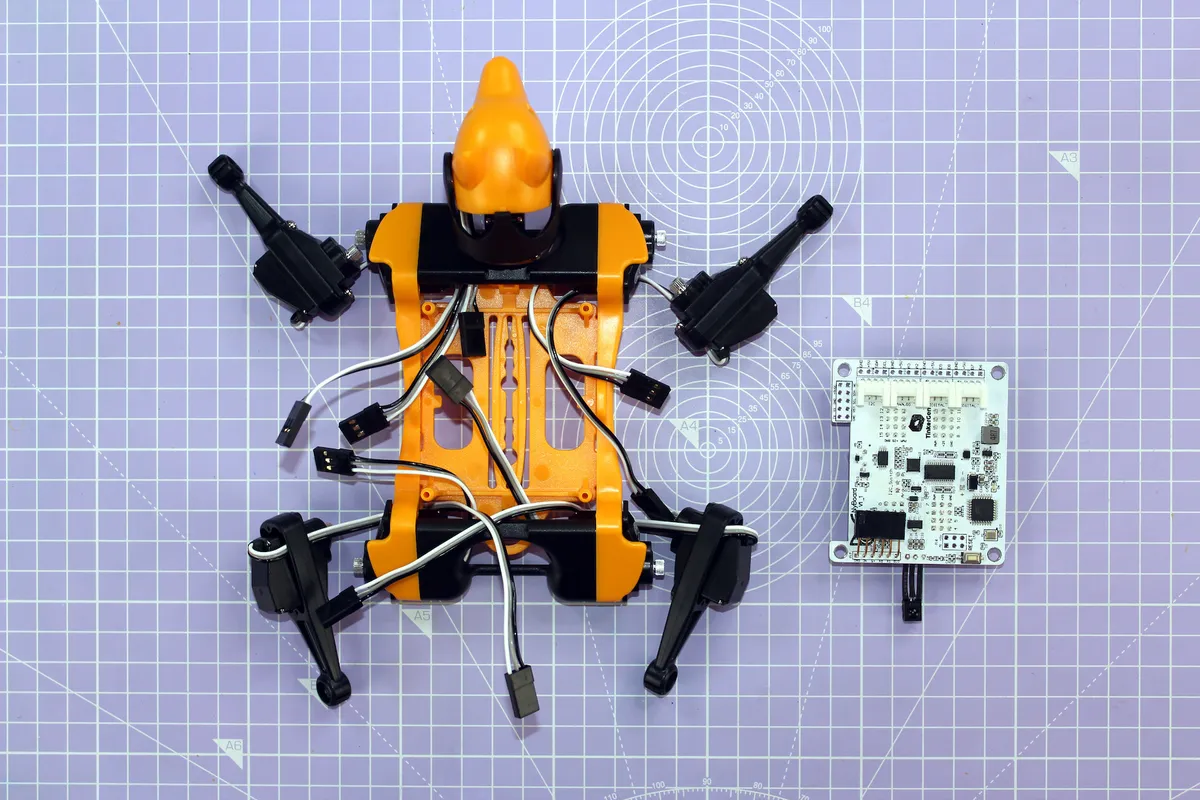
There’s a small infrared sensor at the rear of the NyBoard, which needs to be pulled down before attaching it to the body. It’s just wire and unfolds easily, although I was careful not to ding it too much.
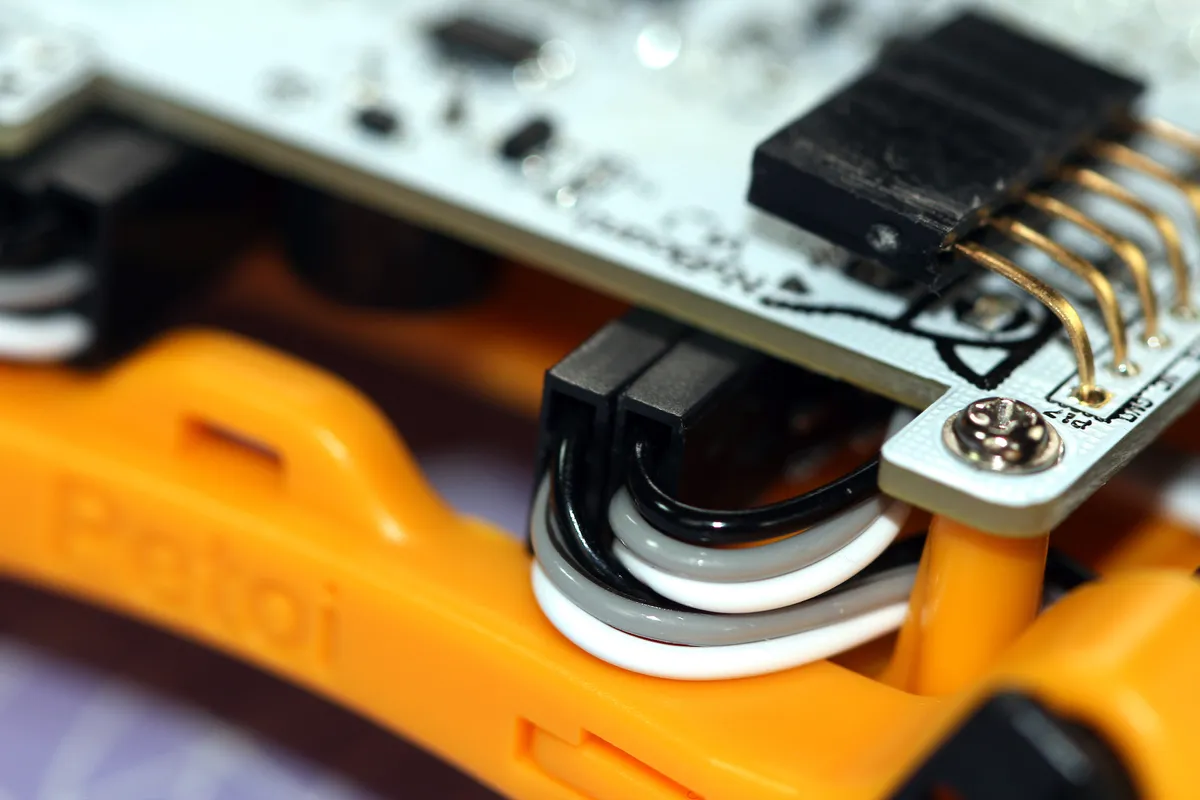
After that, it’s just a case of connecting the servos to the correct pin set on the NyBoard. Once all the servos are connected, it’s important to tuck the cables away neatly so that the NyBoard can be screwed onto the pillars.
The last thing that you’ll need to do before calibration, is to attach the upper leg pieces to complete the model. You’ll need to do this as precisely as possible, and I found I needed to make several adjustments before I was happy.
Calibration of Bittle
Before you start making Bittle do tricks, it will need to be calibrated. There are three ways to calibrate Bittle: through the mobile app, through the desktop app or through Arduino IDE. The easiest (and quickest) way to do this is via the app, and I recommend calibrating via the app if you’re pushed for time.
But be warned: whichever method you choose to calibrate Bittle, it’s a fiddly process!
I decided to calibrate via the app, which is compatible with both iOS and Android. Plug in the blue-coloured Bluetooth adaptor to the six-pin socket on the NyBoard, connect the battery and long-press the button on the back to turn it on. Try not to jump as Bittle suddenly comes to life – and in my case, flailing limbs all over the place.
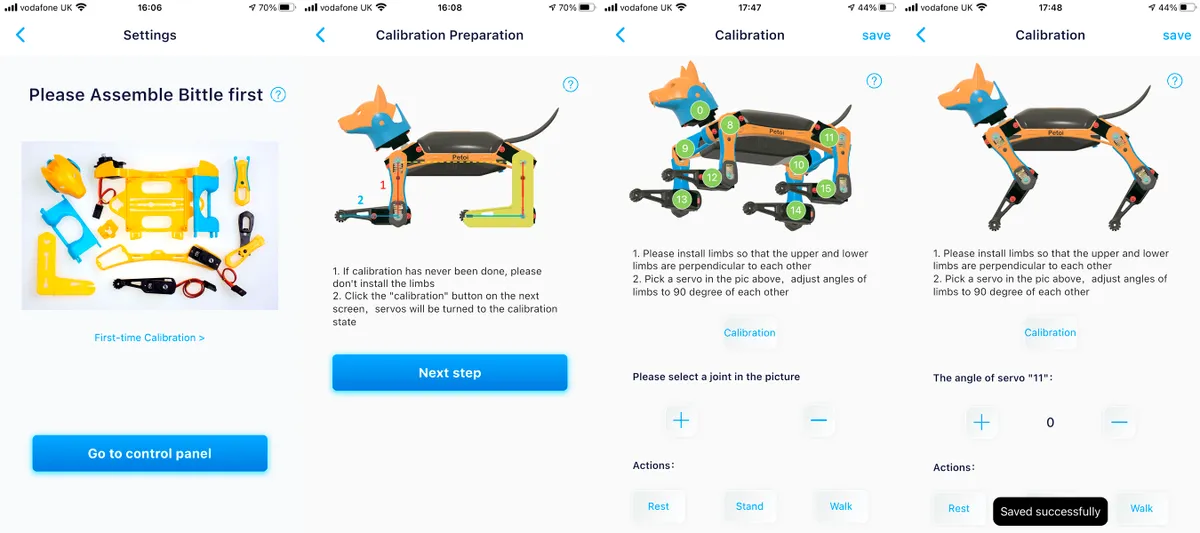
The app will display an image of Bittle, showing each of the nine servos in position. Select each servo in turn (by tapping on the image) and adjust the angle of that joint using the plus or minus buttons on the app. You’re aiming for a perfect 90° angle for each of the legs, and there’s an L-shaped calibration tool (essentially a set-square) in the box to help you.
Once you think it’s calibrated, use the commands to instruct Bittle to stand and rest (lie down). The real test comes when you instruct it to walk. If it doesn’t walk straight, walks in a circle, or falls over when walking, then one (or more) of the legs is not at a perfect 90°.
Unfortunately, you’ve only got your eyes as a way of determining the angle, the app doesn’t tell you. Although fiddly, once I was happy with the calibration, I actually found that I enjoyed the process.
Once you’re happy that you don’t need to make any further coarse adjustments (taking the limbs off again), you’ll need to lock the legs in place using the flat head screws. After that, you’ll need to pop the cable cover off the lower leg piece, before hiding the remaining loose wires inside the leg.
Operation and compatibility
As far as the electronics go, Bittle is powered by NyBoard V1, which is a customised Arduino Uno board, with sockets for external modules. It can drive up to 12 pulse width modulation (PWM) servos, and an IMU (Inertial Measurement Unit) is used for balancing. When Bittle is turned on, you can see the IMU in action when you tilt Bittle to one side; his face and limbs will turn towards you!
Like the software itself, the operation of Bittle is flexible. There are multiple methods available to give you control of your new friend, depending on your experience level and the time you have available. For immediate use straight after building (or taking out the box if you bought the pre-built version), then it comes with a standard infrared remote control.
Alternatively, you can use the mobile app Petoi or the Petoi desktop app. If you’re keen to dive into the world of coding or hone your skills further, then it also uses Arduino IDE (essentially a text editor for writing code) and Python, one of the most popular programming languages (often used to build websites and software and to automate tasks).
It’s also compatible with Raspberry Pi, a credit card-sized computer that plugs into the NyBoard and allows Bittle to analyse more data – even make decisions by itself. But if you don’t fancy writing your own code, you can download demo codes from GitHub.
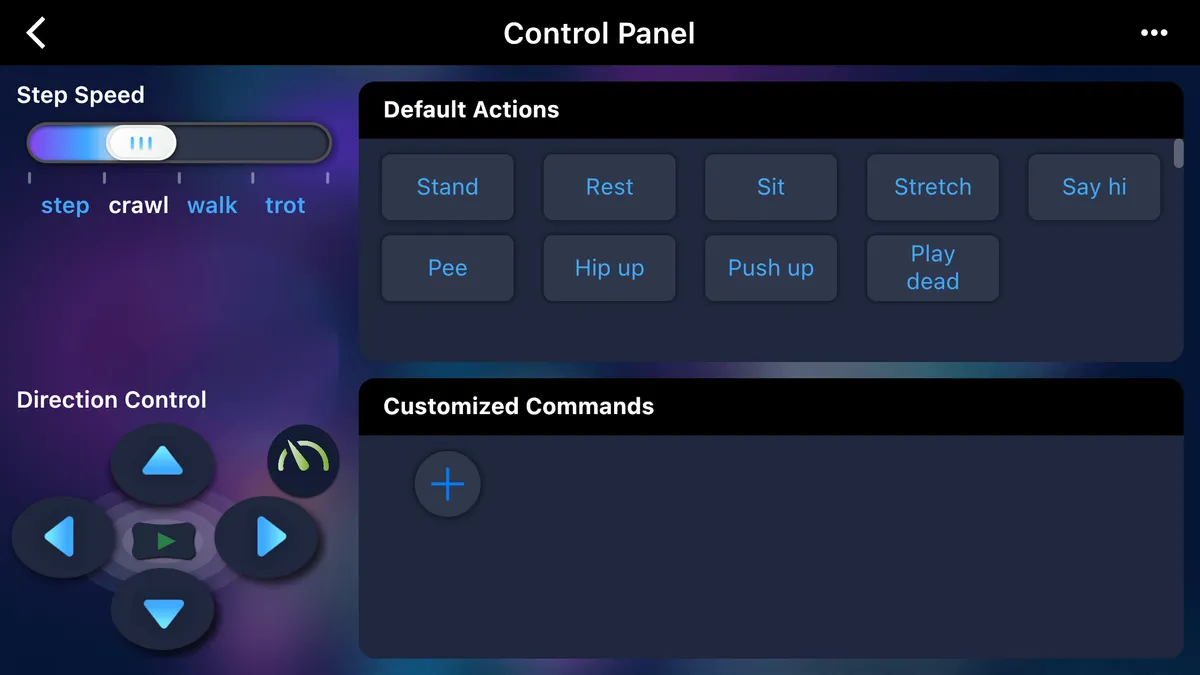
Using the app you can have full control over the robot, and you can even create your own customised commands. From the off, you can instruct Bittle to step, crawl (very cute), walk or trot. There are two pre-set speed settings, fast and slow, with directional arrows to control Bittle like you would a drone, or remote control car.
There are also a number of pre-programmed controls, including stand, rest, sit, stretch, say hi, hip up, push up and play dead. You can even make Bittle raise his back leg… and pee.
The app is clean and straightforward to use, although you do need to reconnect Bittle every time you turn it on.

Build quality
The build quality of Bittle is surprisingly sturdy. According to the manufacturers, an assembled Bittle can support the weight of an adult standing on its back… although I’m not quite that brave to test that particular claim!
Bittle is made with high-strength, injection moulded 3D interlocking parts, so there are only a handful of screws in the whole robot. As the screws that you install as part of the build process are self-tapping (that means they cut a thread into the plastic as you’re screwing them in), once assembled it’s a solid little thing. And it feels it, too.
The tail is made from silicone, which provides a nice little bounce when the robot is in operation, and the NyBoard cover helps add crossbody support.
The exception to this is perhaps the head itself, and the head attachment feels a little flimsy compared to the rest of the robot. However, I’ve not had any problems yet… time will tell.
Verdict
Everything considered, I really like Bittle. It’s the sort of gadget that the more you use, and the more you dive into the coding side of things, the more you’ll get out of it. Going by the plethora of complaints in the community regarding the difficulty assembling the legs in the first iteration, the tweaks that Petoi have made to the build-it-yourself model are certainly for the better.
If you're just after a remote control dog and you're not fussed about coding, with a £300 price tag Bittle is probably not worth the investment. However, as a STEM learning tool, or for anyone interested in robotics and programming, Bittle is a fantastic little gadget, especially when you consider the variety of additional hardware.
Bittle is advertised for ages 14 and up, and although the build is fairly straightforward for bright children, the coding element makes it better suited for adults, or older teen tech enthusiasts.
Alternatives
Vector Robot by Anki
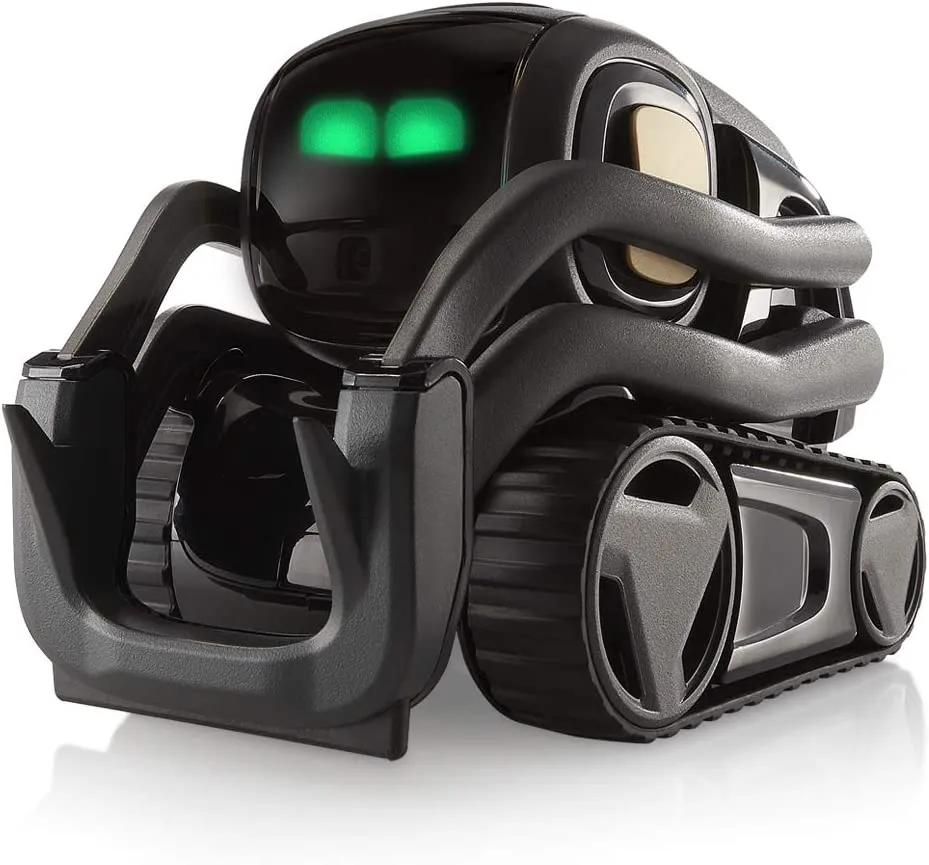
If you're after cute, it's hard to beat the iconic Vector robot from Anki. Powered by AI and advanced robotics, Vector is alive and engaged by sight, sound, and touch. Vector can independently navigate and self-charge, but does require a compatible iOS or Android device, as well as the free Vector app for set up only.
Vector is a curious and attentive companion, who will answer questions, take pictures, and even time your dinner with the built-in Amazon Alexa.
Using an HD camera, he can identify people, see and remember faces, and navigate his environment without bumping into objects (or pets). He's also got a powerful four-microphone array for directional hearing and communicates in a unique language made up of hundreds of synthesised sounds.
SQUIRREL_TEXT_13062034
Freenove Robot Dog Kit
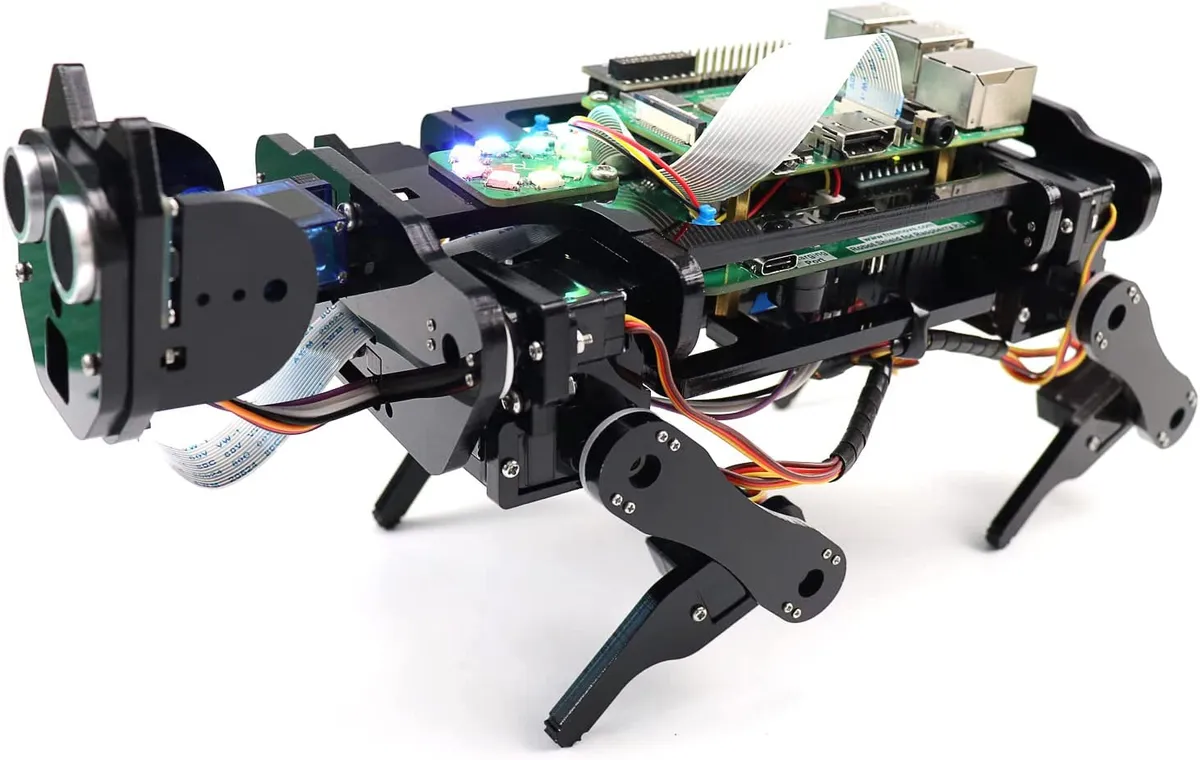
If you're a fan of Raspberry Pi, then the Freenove Robot Dog Kit could be a nice open source alternative. Like Bittle, it requires assembly, although the design is somewhat less polished. It's controlled wirelessly by your Android phone or tablet, but the actual Raspberry Pi and battery are sold separately.
SQUIRREL_TEXT_13099537
ELEGOO Smart Robot Car Kit
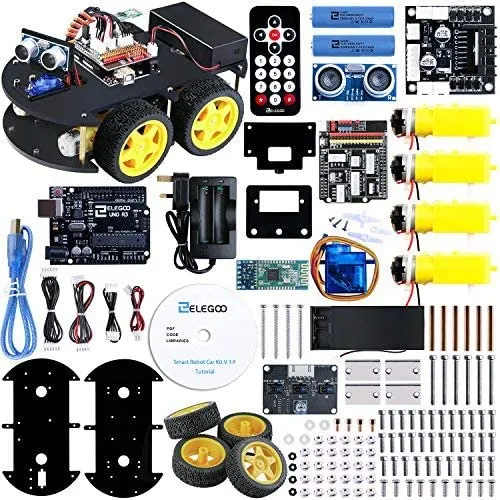
The ELEGOO Smart Robot Car V4.0 has the added bonus of a camera, something that Bittle doesn't have as standard. This robot car is another DIY robot that requires assembly, and like Bittle, runs on Arduino IDE.
It has multiple different modes, including auto-go, infrared control, obstacle avoidance and line tracking modes. In each mode, you will learn how to load programs and command the car to run as instructed. It is, however, significantly bigger and heavier than Bittle, measuring 26.3 x 14.5 x 8cm and weighing in at 1,140g, but is less than a third of the price of Bittle.
SQUIRREL_TEXT_13062036
Read more reviews: